《html2canvas 跨域问题》
近期公司项目有个分享的功能,需要由前端生成包含有关用户信息的图片,点击可以保存。于是选用了html2canvas
github链接
https://github.com/niklasvh/html2canvas
官网链接
http://html2canvas.hertzen.com/
官网的案例
// document.body 可以替换成想要生成图片的dom元素
html2canvas(document.body, {
 onrendered: function(canvas) {
   document.body.appendChild(canvas);
 }
});
2
3
4
5
6
# 图片跨域
使用接口返回的图片数据,会出现以下报错(一般来说会出现下面的报错,但是在vue项目中没有报错)
Uncaught SecurityError: Failed to execute 'toDataURL' on 'HTMLCanvasElement': Tainted canvases may not be exported.
# 方法一
获取数据后,将图片先转为base64,再重新赋值到src 上。(缺点:需要每一张图片都进行一次转换)
# 方法二
配置参数 useCORS: true
html2canvas(document.body, {
 useCORS: true,// 允许跨域
 onrendered: function(canvas) {
   document.body.appendChild(canvas);
 }
});
2
3
4
5
6
# 完美解决跨域和模糊的方法
网上的大神已经很好的解决了这个问题
https://segmentfault.com/q/1010000004006610 https://segmentfault.com/a/1190000007707209
我把解决代码贴一下
源码需要修改的地方有两处:
# 1. 修改判断条件
代码第 999 行 renderWindow 的方法中 修改判断条件 增加一个options.scale存在的条件
源码:
if (options.type === "view") {
    canvas = crop(renderer.canvas, {width: renderer.canvas.width, height: renderer.canvas.height, top: 0, left: 0, x: 0, y: 0});
} else if (node === clonedWindow.document.body || node === clonedWindow.document.documentElement || options.canvas != null) {
    canvas = renderer.canvas;
} else {
    canvas = crop(renderer.canvas, {width:  options.width != null ? options.width : bounds.width, height: options.height != null ? options.height : bounds.height, top: bounds.top, left: bounds.left, x: 0, y: 0});

}
2
3
4
5
6
7
8
改为:
if (options.type === "view") {
    canvas = crop(renderer.canvas, {width: renderer.canvas.width, height: renderer.canvas.height, top: 0, left: 0, x: 0, y: 0});
} else if (node === clonedWindow.document.body || node === clonedWindow.document.documentElement) {
    canvas = renderer.canvas;
}else if(options.scale && options.canvas !=null){
    log("放大canvas",options.canvas);
    var scale = options.scale || 1;
    canvas = crop(renderer.canvas, {width: bounds.width * scale, height:bounds.height * scale, top: bounds.top *scale, left: bounds.left *scale, x: 0, y: 0});
}
else {
    canvas = crop(renderer.canvas, {width:  options.width != null ? options.width : bounds.width, height: options.height != null ? options.height : bounds.height, top: bounds.top, left: bounds.left, x: 0, y: 0});
}
2
3
4
5
6
7
8
9
10
11
12
# 2. 修改width,height
代码第 943 行 html2canvas 的方法中 修改width,height
源码:
return renderDocument(node.ownerDocument, options, node.ownerDocument.defaultView.innerWidth, node.ownerDocument.defaultView.innerHeight, index).then(function(canvas) {
    if (typeof(options.onrendered) === "function") {
        log("options.onrendered is deprecated, html2canvas returns a Promise containing the canvas");
        options.onrendered(canvas);
    }
    return canvas;
});
2
3
4
5
6
7
改为:
width = options.width != null ? options.width : node.ownerDocument.defaultView.innerWidth;
height = options.height != null ? options.height : node.ownerDocument.defaultView.innerHeight;
return renderDocument(node.ownerDocument, options, width, height, index).then(function(canvas) {
   if (typeof(options.onrendered) === "function") {
       log("options.onrendered is deprecated, html2canvas returns a Promise containing the canvas");
       options.onrendered(canvas);
   }
   return canvas;
});
2
3
4
5
6
7
8
9
# 3. 正确使用
html2Canvas() {
   const shareContent = document.getElementById('share-content') // 需要绘制的部分的 (原生)dom 对象 ,注意容器的宽度不要使用百分比,使用固定宽度,避免缩放问题
   const width = shareContent.offsetWidth // 获取(原生)dom 宽度
   const height = shareContent.offsetHeight // 获取(原生)dom 高
   const offsetTop = shareContent.offsetTop // 元素距离顶部的偏移量
   const canvas = document.createElement('canvas') // 创建canvas 对象
   const context = canvas.getContext('2d')
   const scaleBy = getPixelRatio(context) // 获取像素密度的方法 (也可以采用自定义缩放比例)
   canvas.width = width * scaleBy // 这里 由于绘制的dom 为固定宽度,居中,所以没有偏移
   canvas.height = (height + offsetTop) * scaleBy // 注意高度问题,由于顶部有个距离所以要加上顶部的距离,解决图像高度偏移问题
   context.scale(scaleBy, scaleBy)
   const opts = {
     // allowTaint: true, // 允许加载跨域的图片 (使用这个会报错)
     useCORS: true,  // 允许加载跨域图片
     tainttest: true, // 检测每张图片都已经加载完成
     scale: scaleBy, // 添加的scale 参数
     canvas: canvas, // 自定义 canvas
     // logging: true, // 日志开关,发布的时候记得改成false
     width: width, // dom 原始宽度
     height: height // dom 原始高度
   }
   html2canvas(shareContent, opts).then(function (canvas) {
     const _src = canvas.toDataURL()
     const img = document.createElement('img')
     img.id = 'shareImgCanvas'
     img.src = _src
     img.style.cssText = 'width: 100%;'
     console.log('html2canvas')
   })
 },
 getPixelRatio(context) { // 获取设备的pixel ratio
   const backingStore = context.backingStorePixelRatio ||
   context.webkitBackingStorePixelRatio ||
   context.mozBackingStorePixelRatio ||
   context.msBackingStorePixelRatio ||
   context.oBackingStorePixelRatio ||
   context.backingStorePixelRatio || 1
   return (window.devicePixelRatio || 1) / backingStore
 }
2
3
4
5
6
7
8
9
10
11
12
13
14
15
16
17
18
19
20
21
22
23
24
25
26
27
28
29
30
31
32
33
34
35
36
37
38
39
# 需要注意的几个方面:
# 1. 样式问题
由于图片数据都是动态加载的,css样式不起作用,可以在生成图片的时候要加上样式
img.style.cssText = 'width: 100%;'
# 2. 图片层级问题
需要生成图片的dom背景不能透明,也不能设置为display:none,否则截图出来就会是透明的图片或者一片空白。如果不想将生成图片的dom展示给用户,可以将dom层级降低.
/* // 如果内容过多,视图可以滚动,则要设置为fixed,使得dom一直处于视图内,不然无法正确的截取到dom
// left 、top最好设置为0,否则在生成图片的时候会把偏移量计算出来,生成的图片会有偏移量相对应的空白高度 */
img-wrap {
  position: fixed;
  left:0;
  top:0;
  z-index: -1;
}
2
3
4
5
6
7
8
9
# 3. 背景图片问题
不要使用背景图片,源码里也有说明

# 4. 版本选择
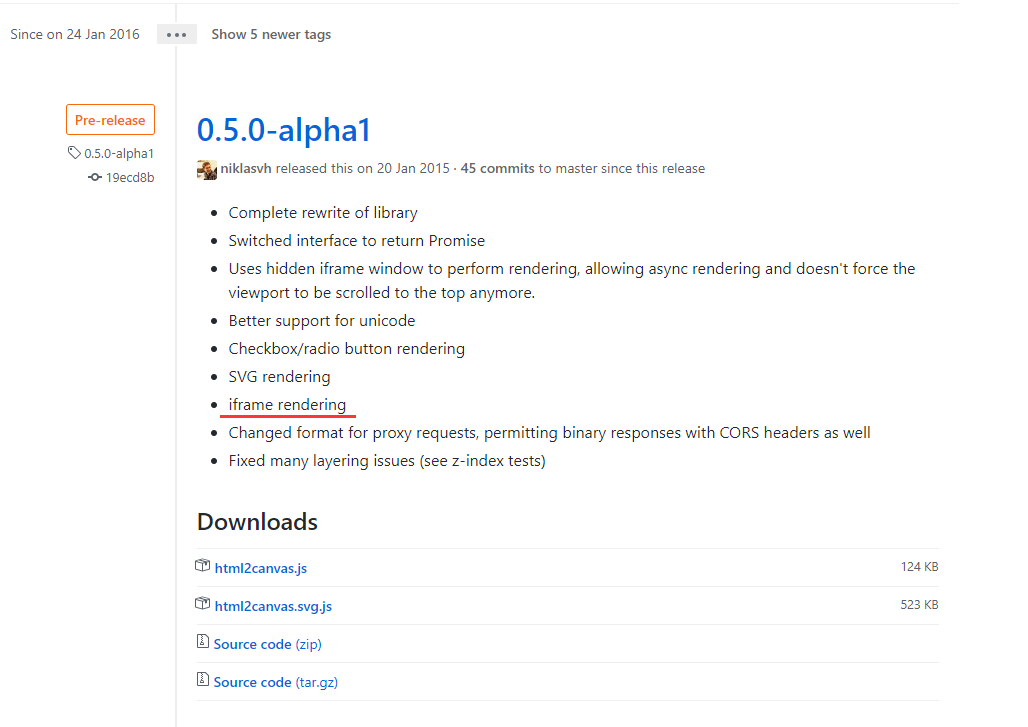
html2canvas 0.5.n的beta版本中已经采用了iframe rendering的方法,作者也有说明

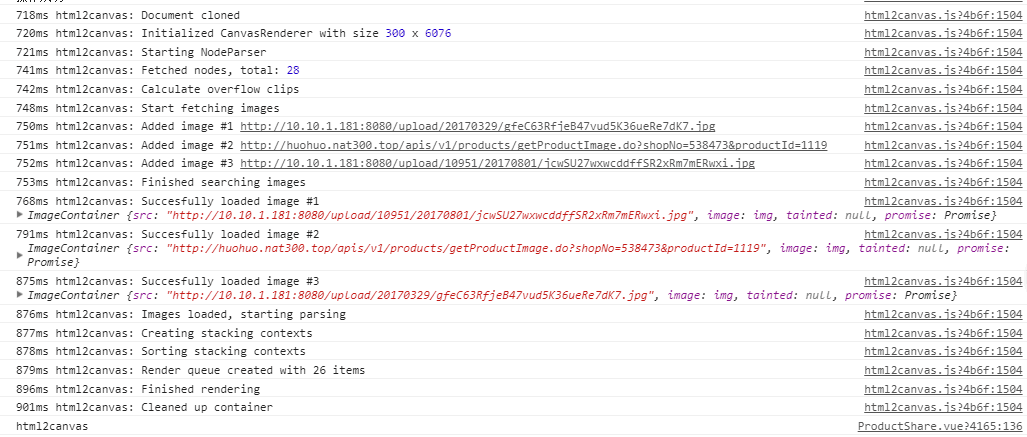
将ops中的logging: true打开会看到整个过程

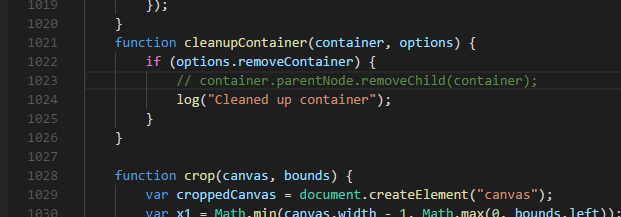
在源码中注释1023行的removeChild,可以看的更加清晰

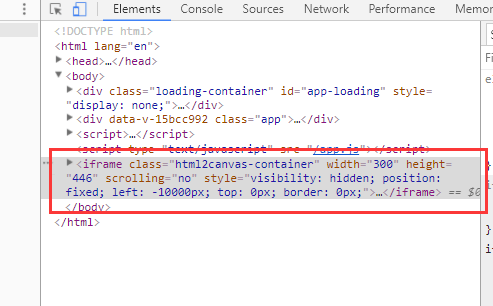
再次操作,会发现页面中多了一个iframe,它是将这个dom树都clone了一遍,再插入body中

如果是移动端,同时有多个数据以列表的方式展示,那每次点击生成图片都会把页面中的图片重新加载一次,这样多次请求会让页面加载特别慢。
解决:
1、跳到新的页面,避免需要生成图片的dom装载太多数据。
2、使用低版本的html2canvas
