《java环境配置以及启动项目》
以 mac 安装作为示例
# 安装环境
# 下载jdk
也可用 brew 下载,brew 安装会自动设置环境变量,不需要手动设置
官网历史版本下载地址:访问地址
jdk8 下载地址:访问地址
下载对应版本后,双击直接安装即可。
默认安装路径:/Library/Java/JavaVirtualMachines/jdk1.8.0_361.jdk/Contents/Home
# 下载maven
官网历史版本下载地址:访问地址
3.8.1 版本下载地址:访问地址
下载后不需要安装,直接放到想放置的目录即可。
查看目录完整路径
# 进入目录后输入
pwd
# 正常会输出 /Users/liyanni/Documents/projects/maven/apache-maven-3.8.1
1
2
3
2
3
# 配置环境变量
修改配置
vim ~/.bash_profile
1
在 .bash_profile 设置以下内容
export JAVA_HOME=/Library/Java/JavaVirtualMachines/jdk1.8.0_361.jdk/Contents/Home
export CLASSPATH=$JAVA_HOME/lib/tools.jar:$JAVA_HOME/lib/dt.jar:.
export MAVEN_HOME=/Users/liyanni/Documents/projects/maven/apache-maven-3.8.1
export PATH=$JAVA_HOME/bin:$PATH:$MAVEN_HOME/bin:.
1
2
3
4
2
3
4
使配置生效
source ~/.bash_profile
1
确认是否成功
# 成功会输出 java 版本号
java -version
# 成功会输出 Maven home 路径 和 java 版本号
mvn -v
1
2
3
4
2
3
4
# idea配置
# 配置jdk
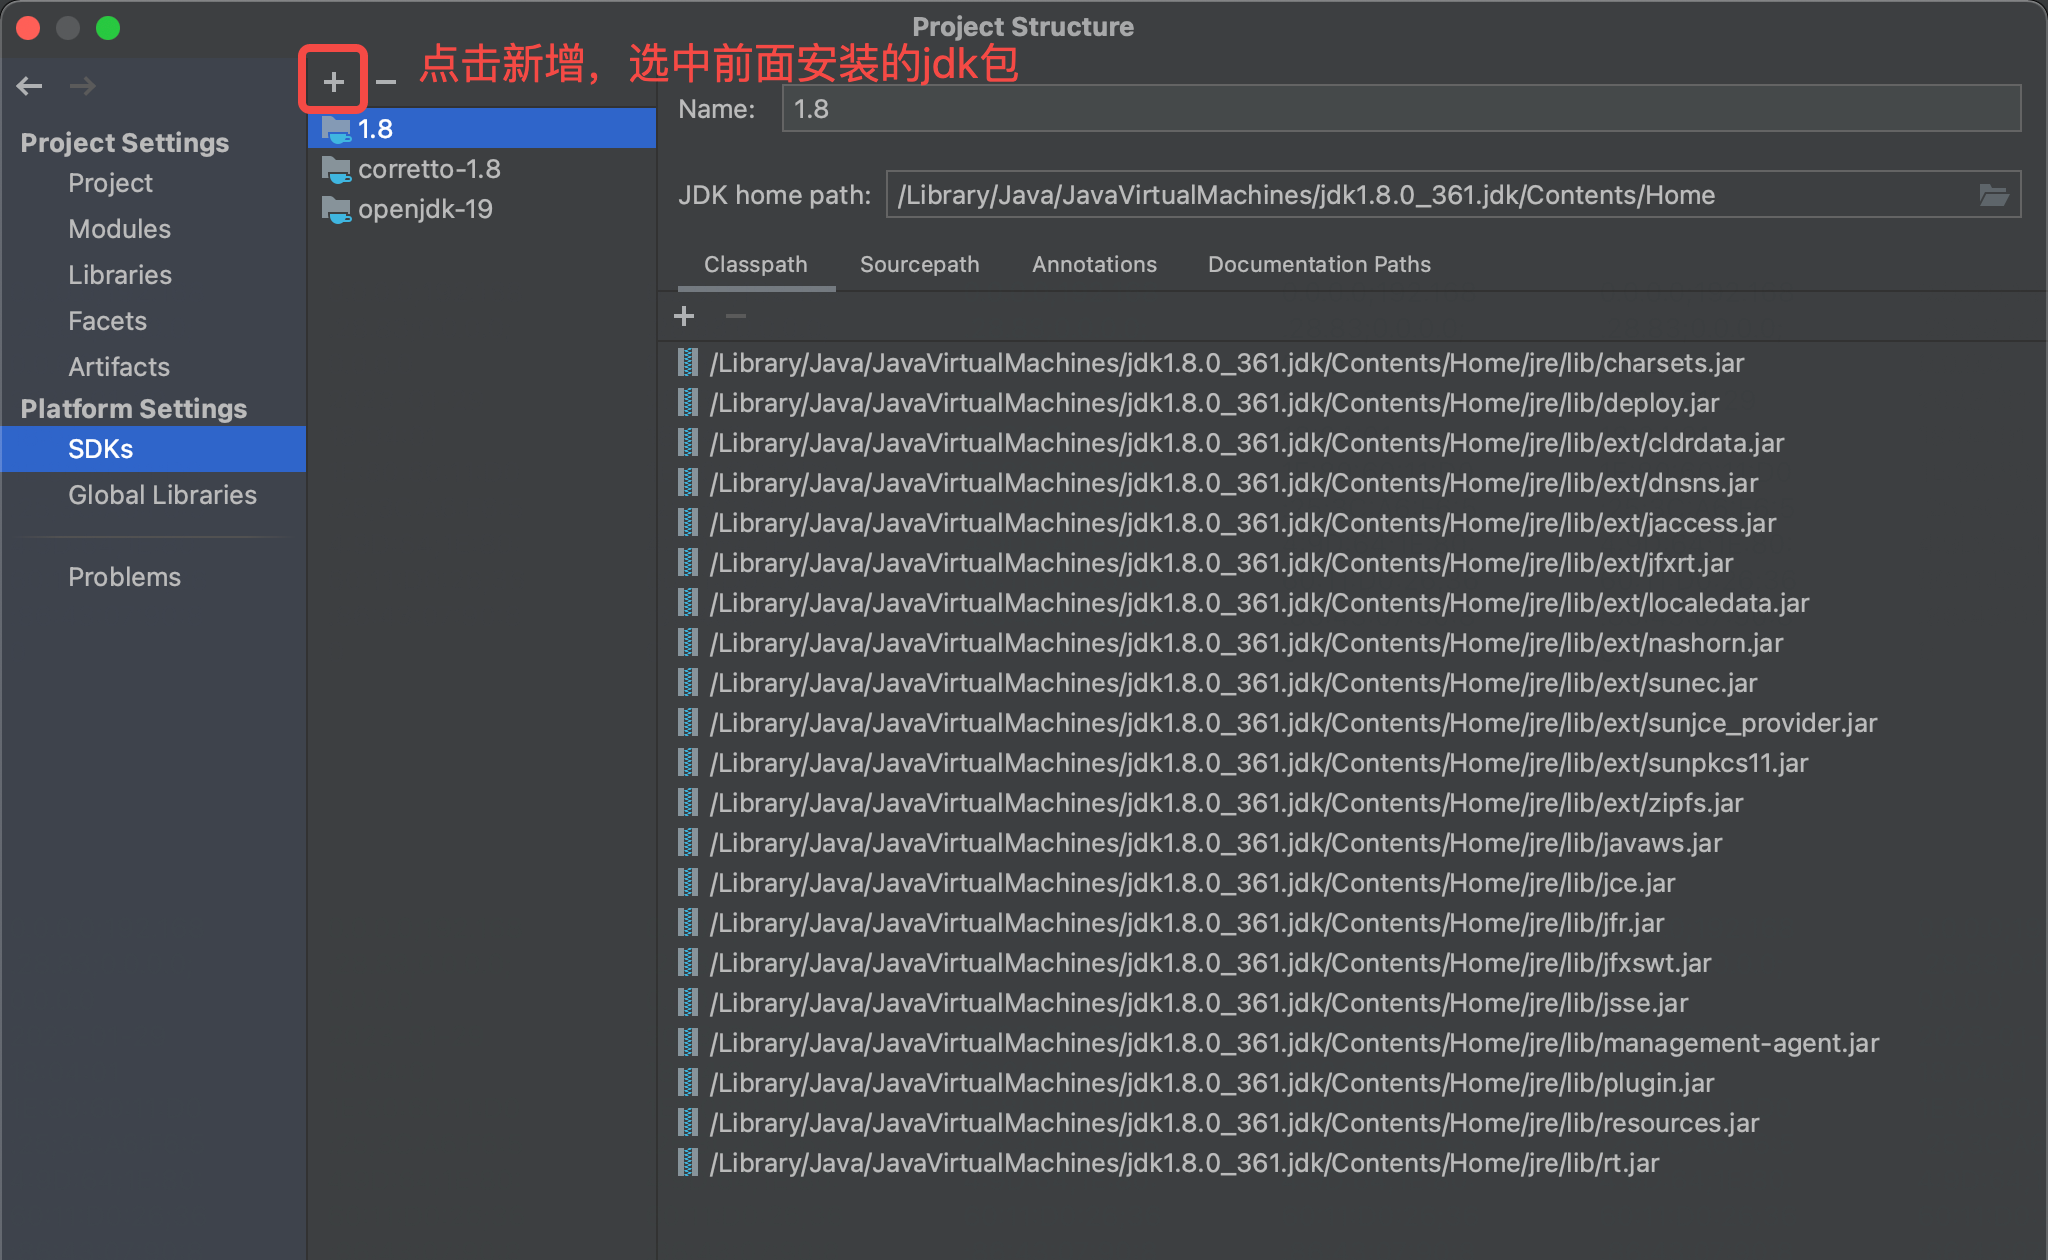
File =》Project Structure =》SDK
添加前面安装的jdk8
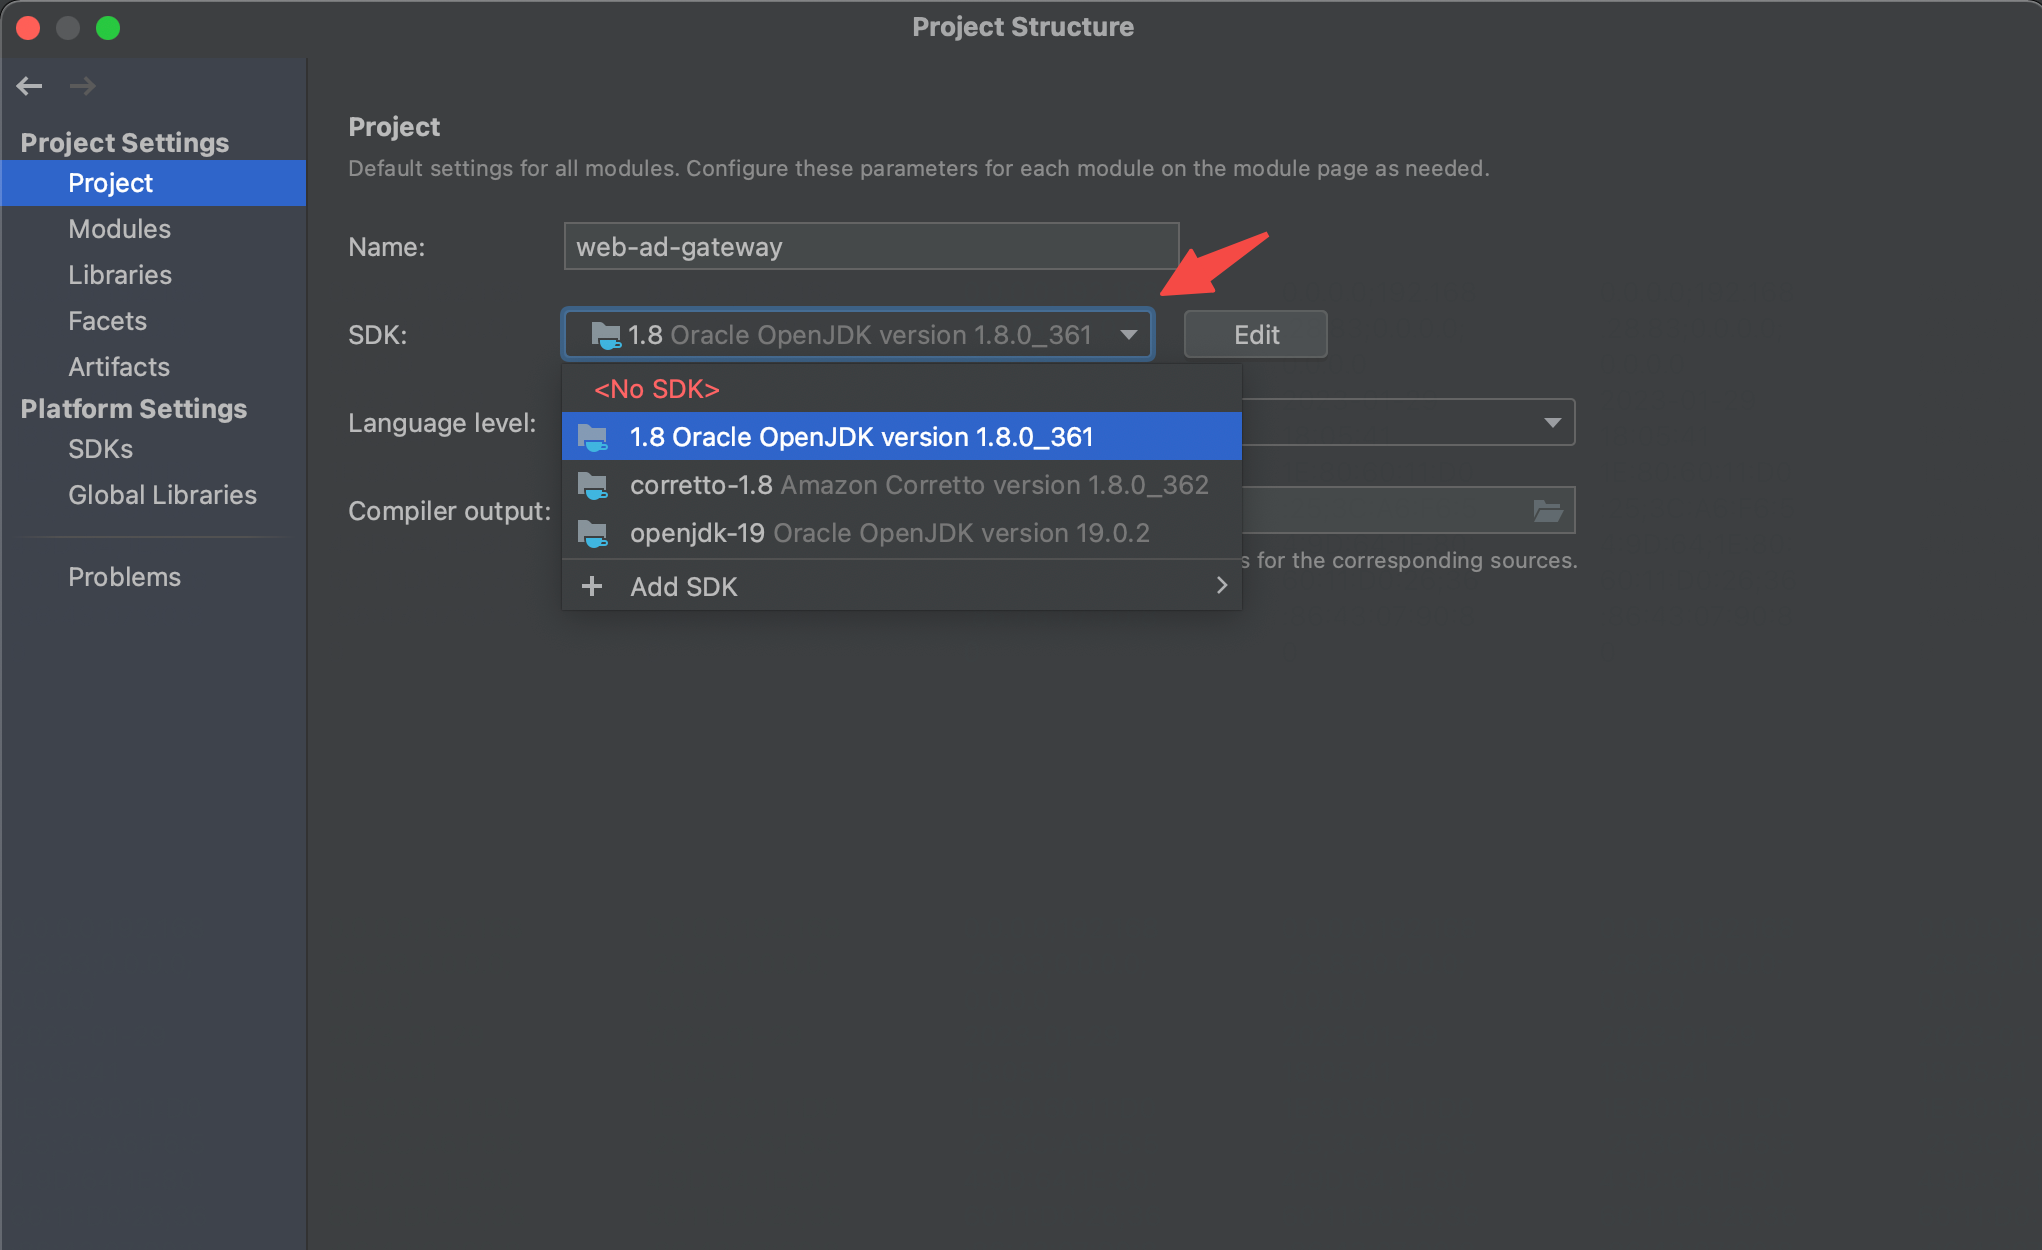
File =》Project Structure =》Project
添加前面安装的jdk8
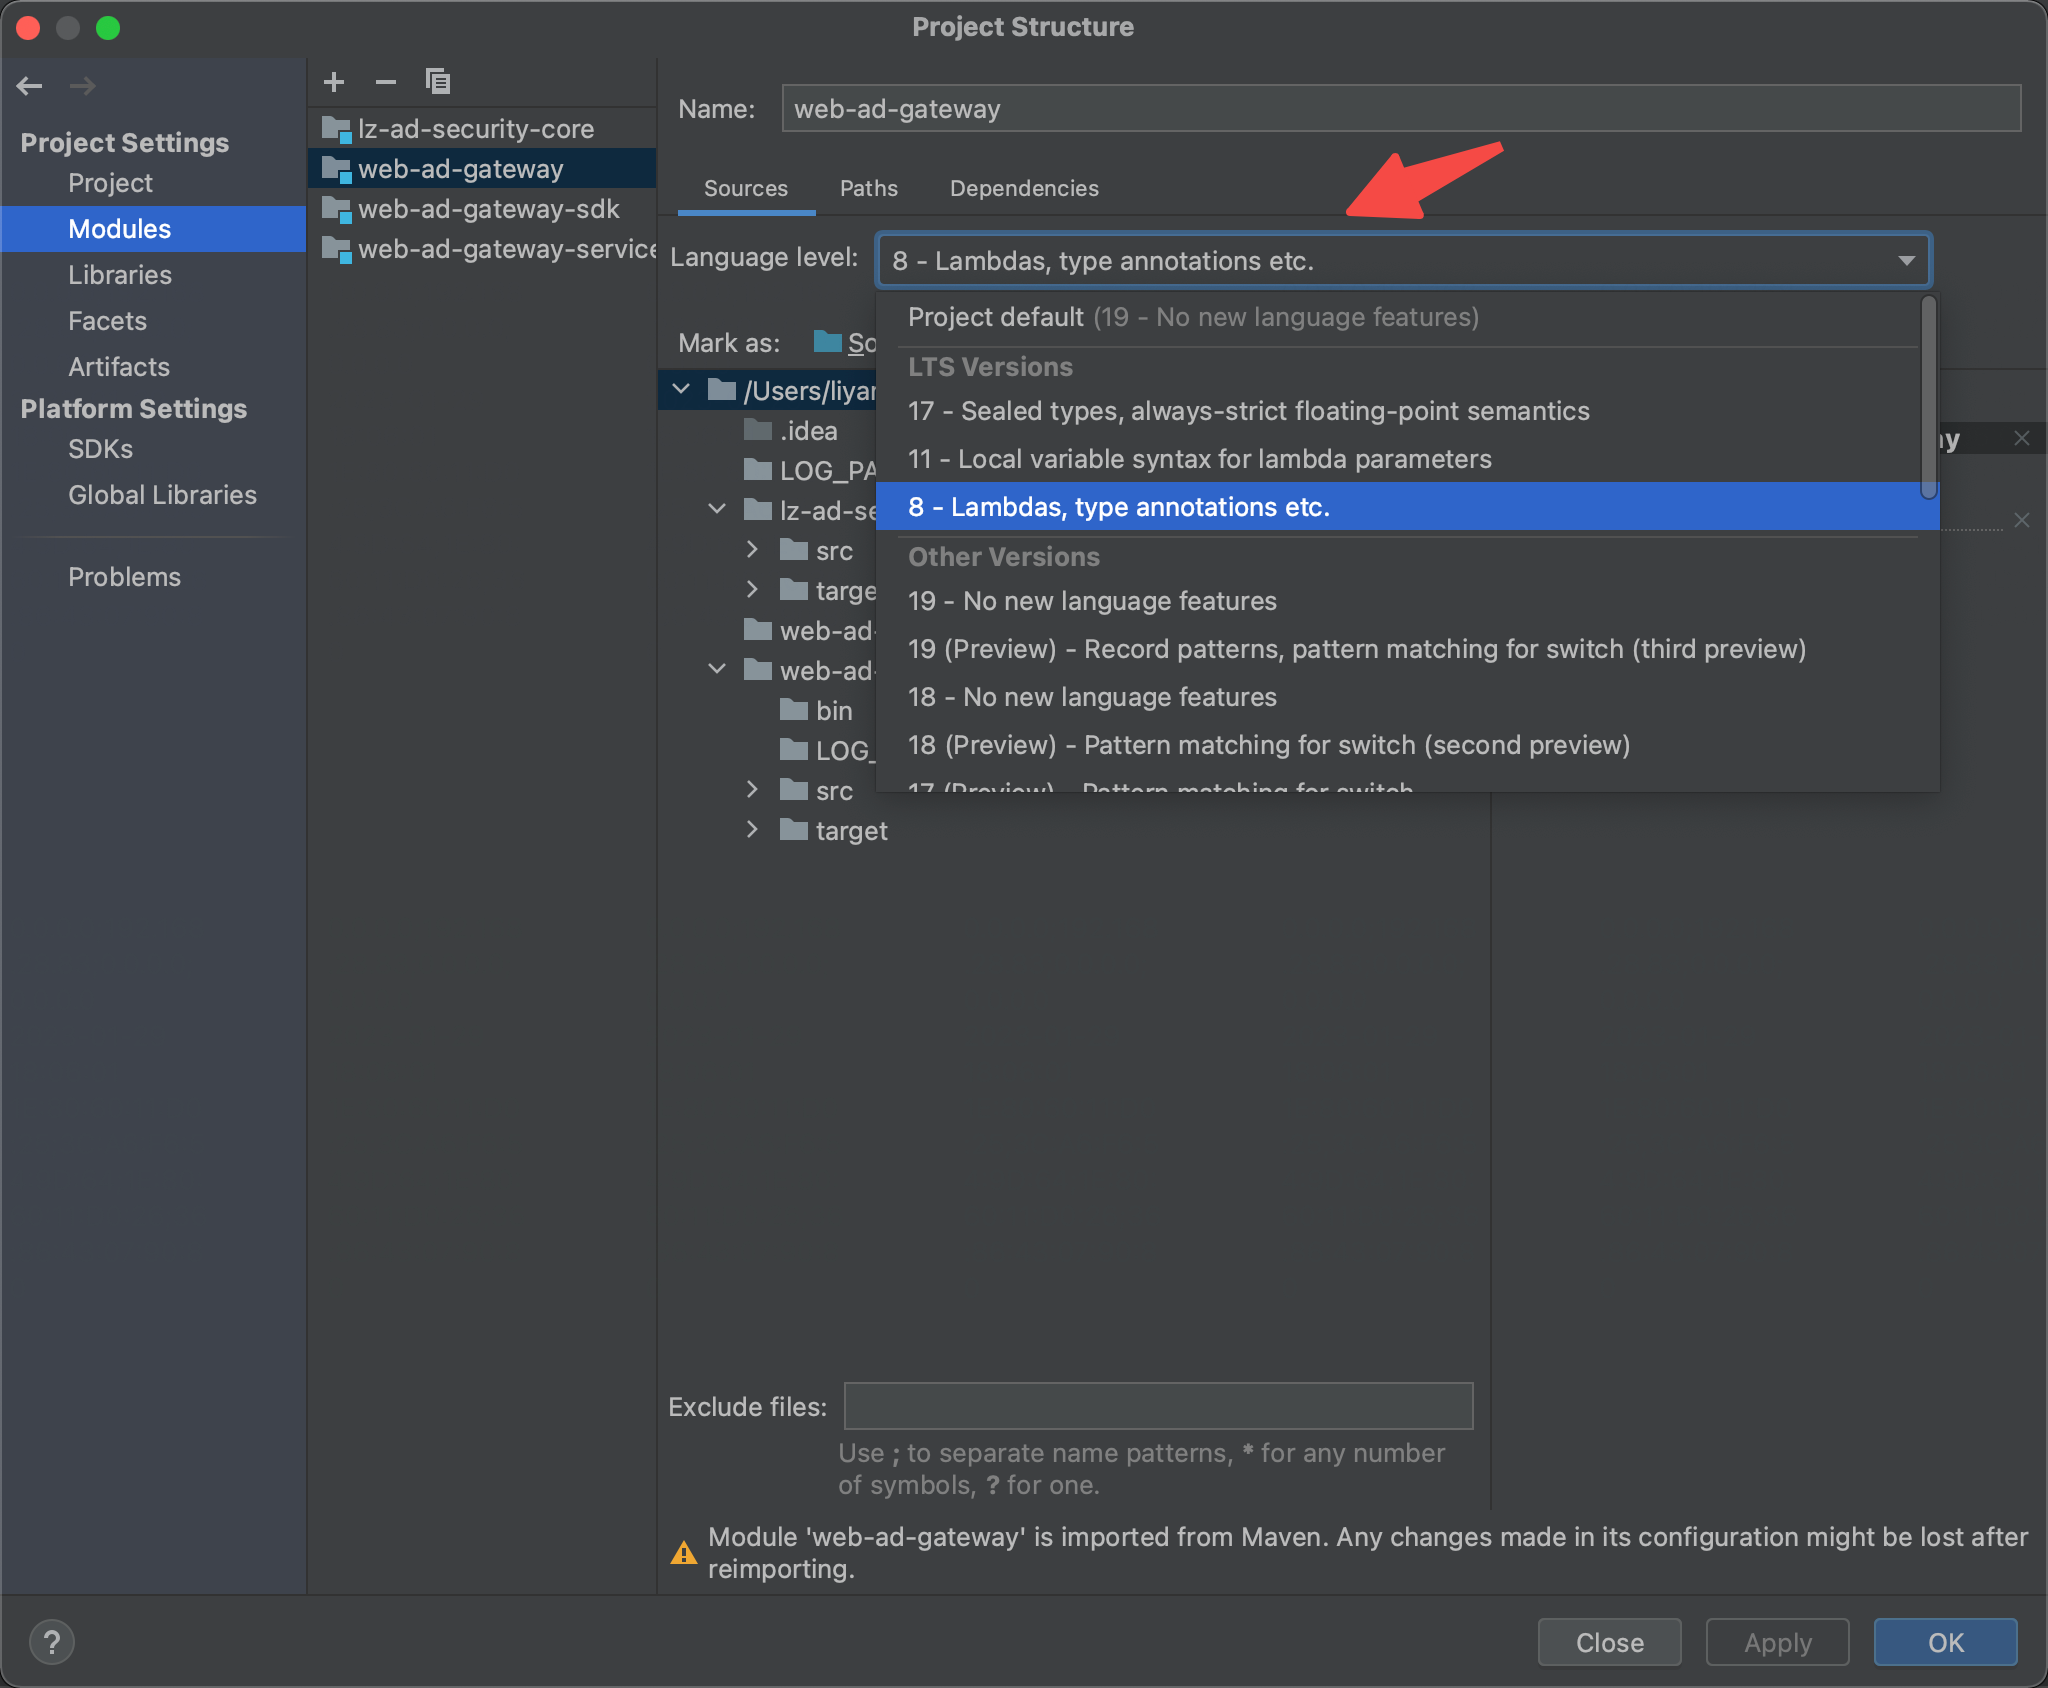
File =》Project Structure =》Modules
选中对应版本
# 配置maven
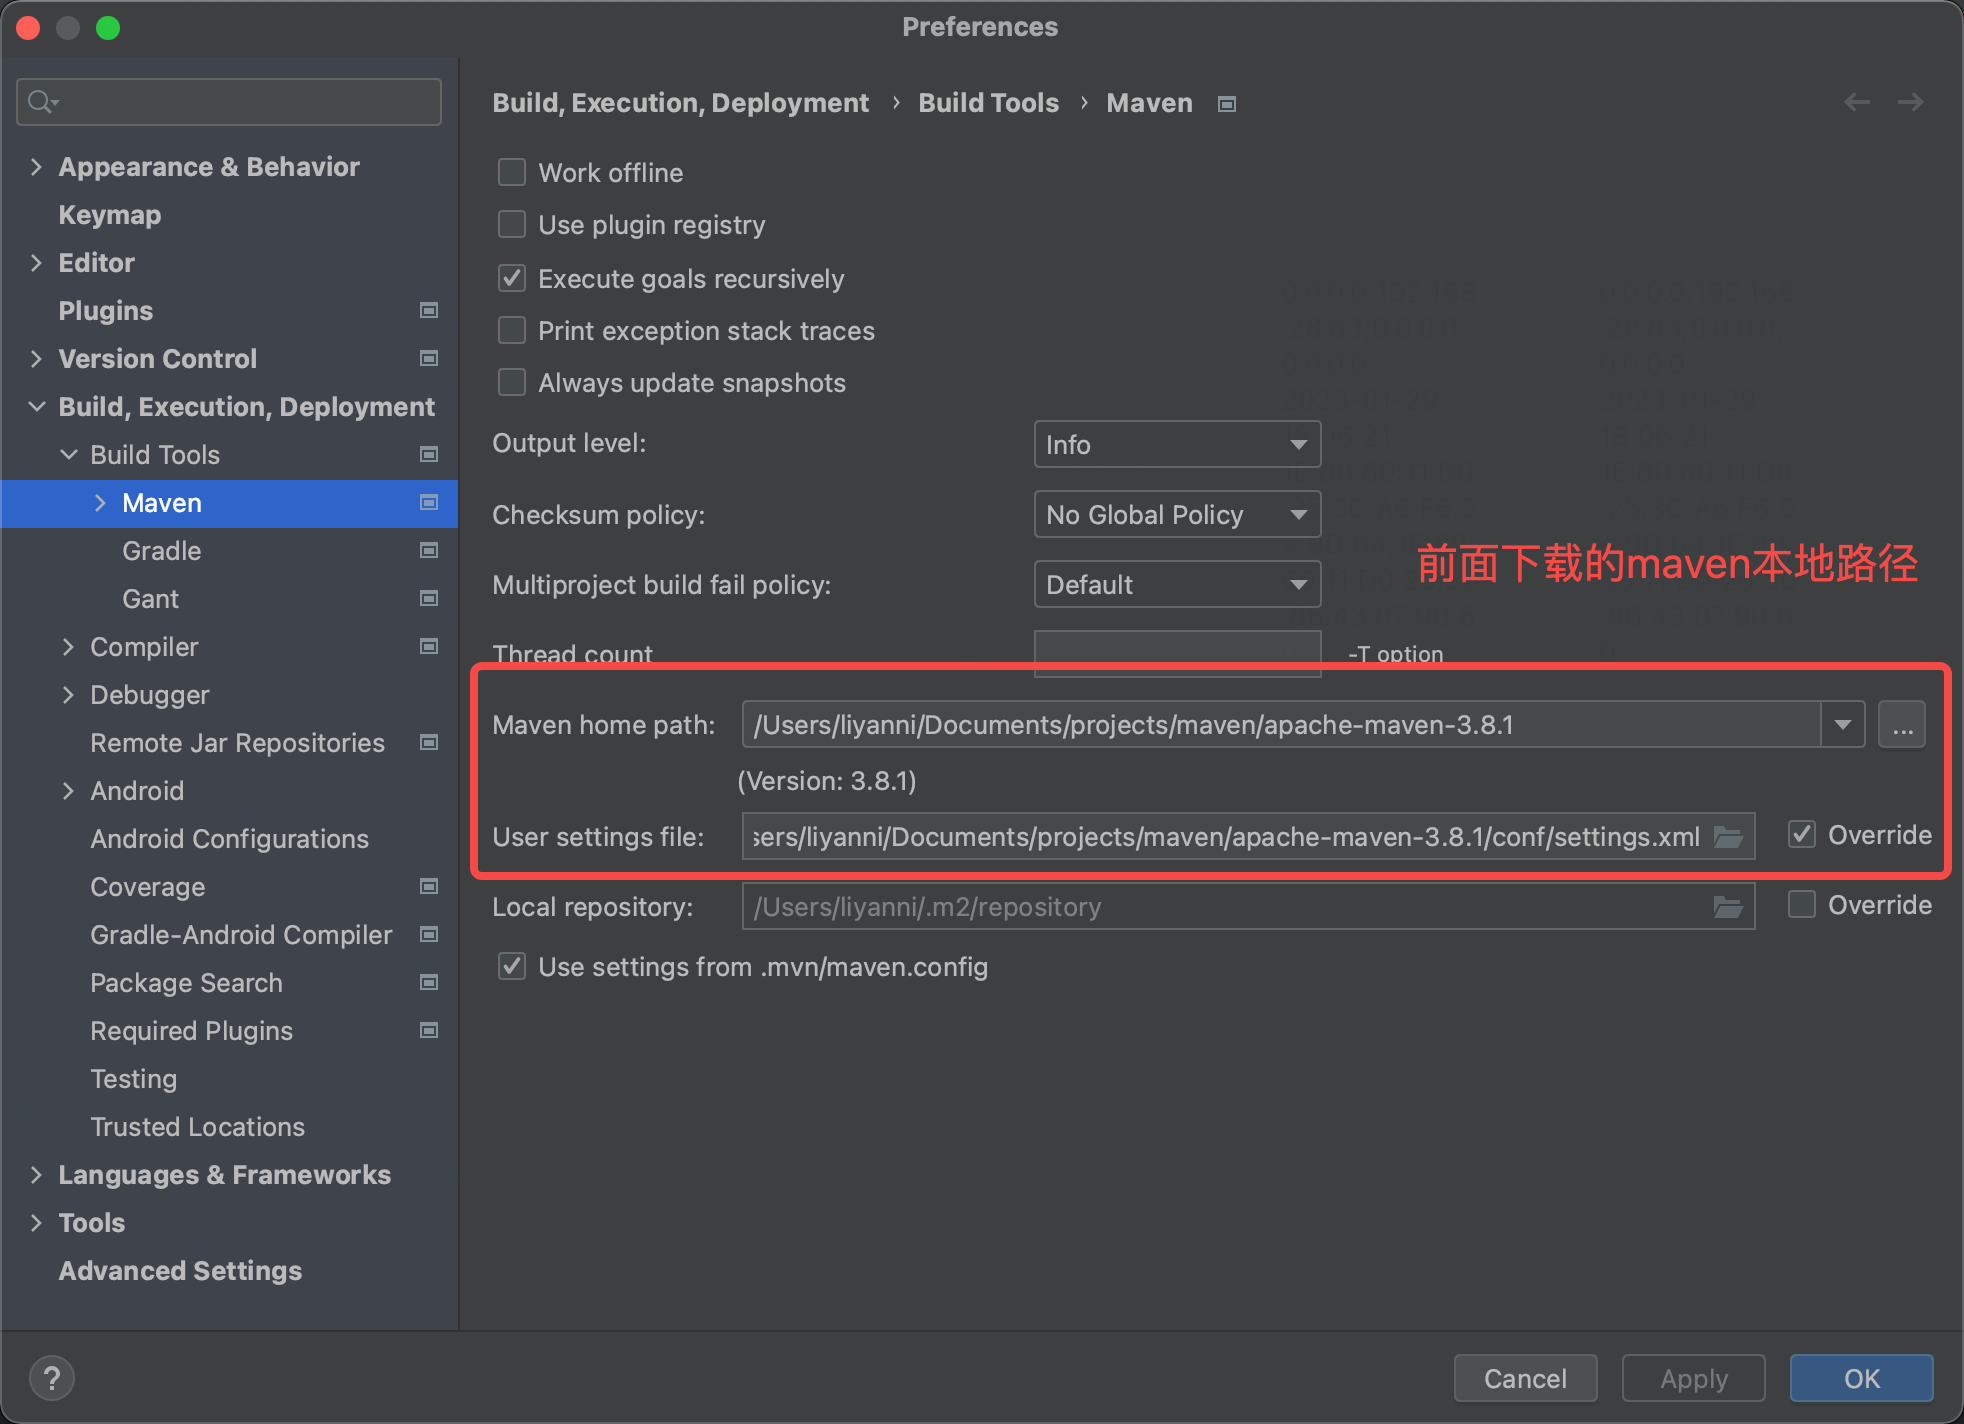
idea =》 Preference =》搜索 Maven
# maven修改仓库地址
进入 /Users/liyanni/Documents/projects/maven/apache-maven-3.8.1/conf/settings.xml
<?xml version="1.0" encoding="UTF-8"?>

<settings xmlns="http://maven.apache.org/SETTINGS/1.0.0"
          xmlns:xsi="http://www.w3.org/2001/XMLSchema-instance"
          xsi:schemaLocation="http://maven.apache.org/SETTINGS/1.0.0 http://maven.apache.org/xsd/settings-1.0.0.xsd">
  <!-- ... -->
  <mirrors>
    <!-- 调整为本地仓库地址 -->
    <mirror>
      <id>xx.com</id>
      <name>xxMirror</name>
      <url>http://xxx/nexus/content/groups/public</url>
      <mirrorOf>central</mirrorOf>
    </mirror>
  </mirrors>

  <profiles>
    <profile>
      <id>downloadSources</id>
      <properties>
          <downloadSources>true</downloadSources>
          <downloadJavadocs>true</downloadJavadocs>
          <releases.repo>http://xxx/nexus/content/repositories/releases</releases.repo>
          <snapshots.repo>http://xxx/nexus/content/repositories/public</snapshots.repo>
      </properties>
    </profile>

  </profiles>
 <activeProfiles>
    <activeProfile>downloadSources</activeProfile>
  </activeProfiles>
</settings>
1
2
3
4
5
6
7
8
9
10
11
12
13
14
15
16
17
18
19
20
21
22
23
24
25
26
27
28
29
30
31
32
33
2
3
4
5
6
7
8
9
10
11
12
13
14
15
16
17
18
19
20
21
22
23
24
25
26
27
28
29
30
31
32
33
# idea启动项目
# maven install
右侧边栏 =》maven

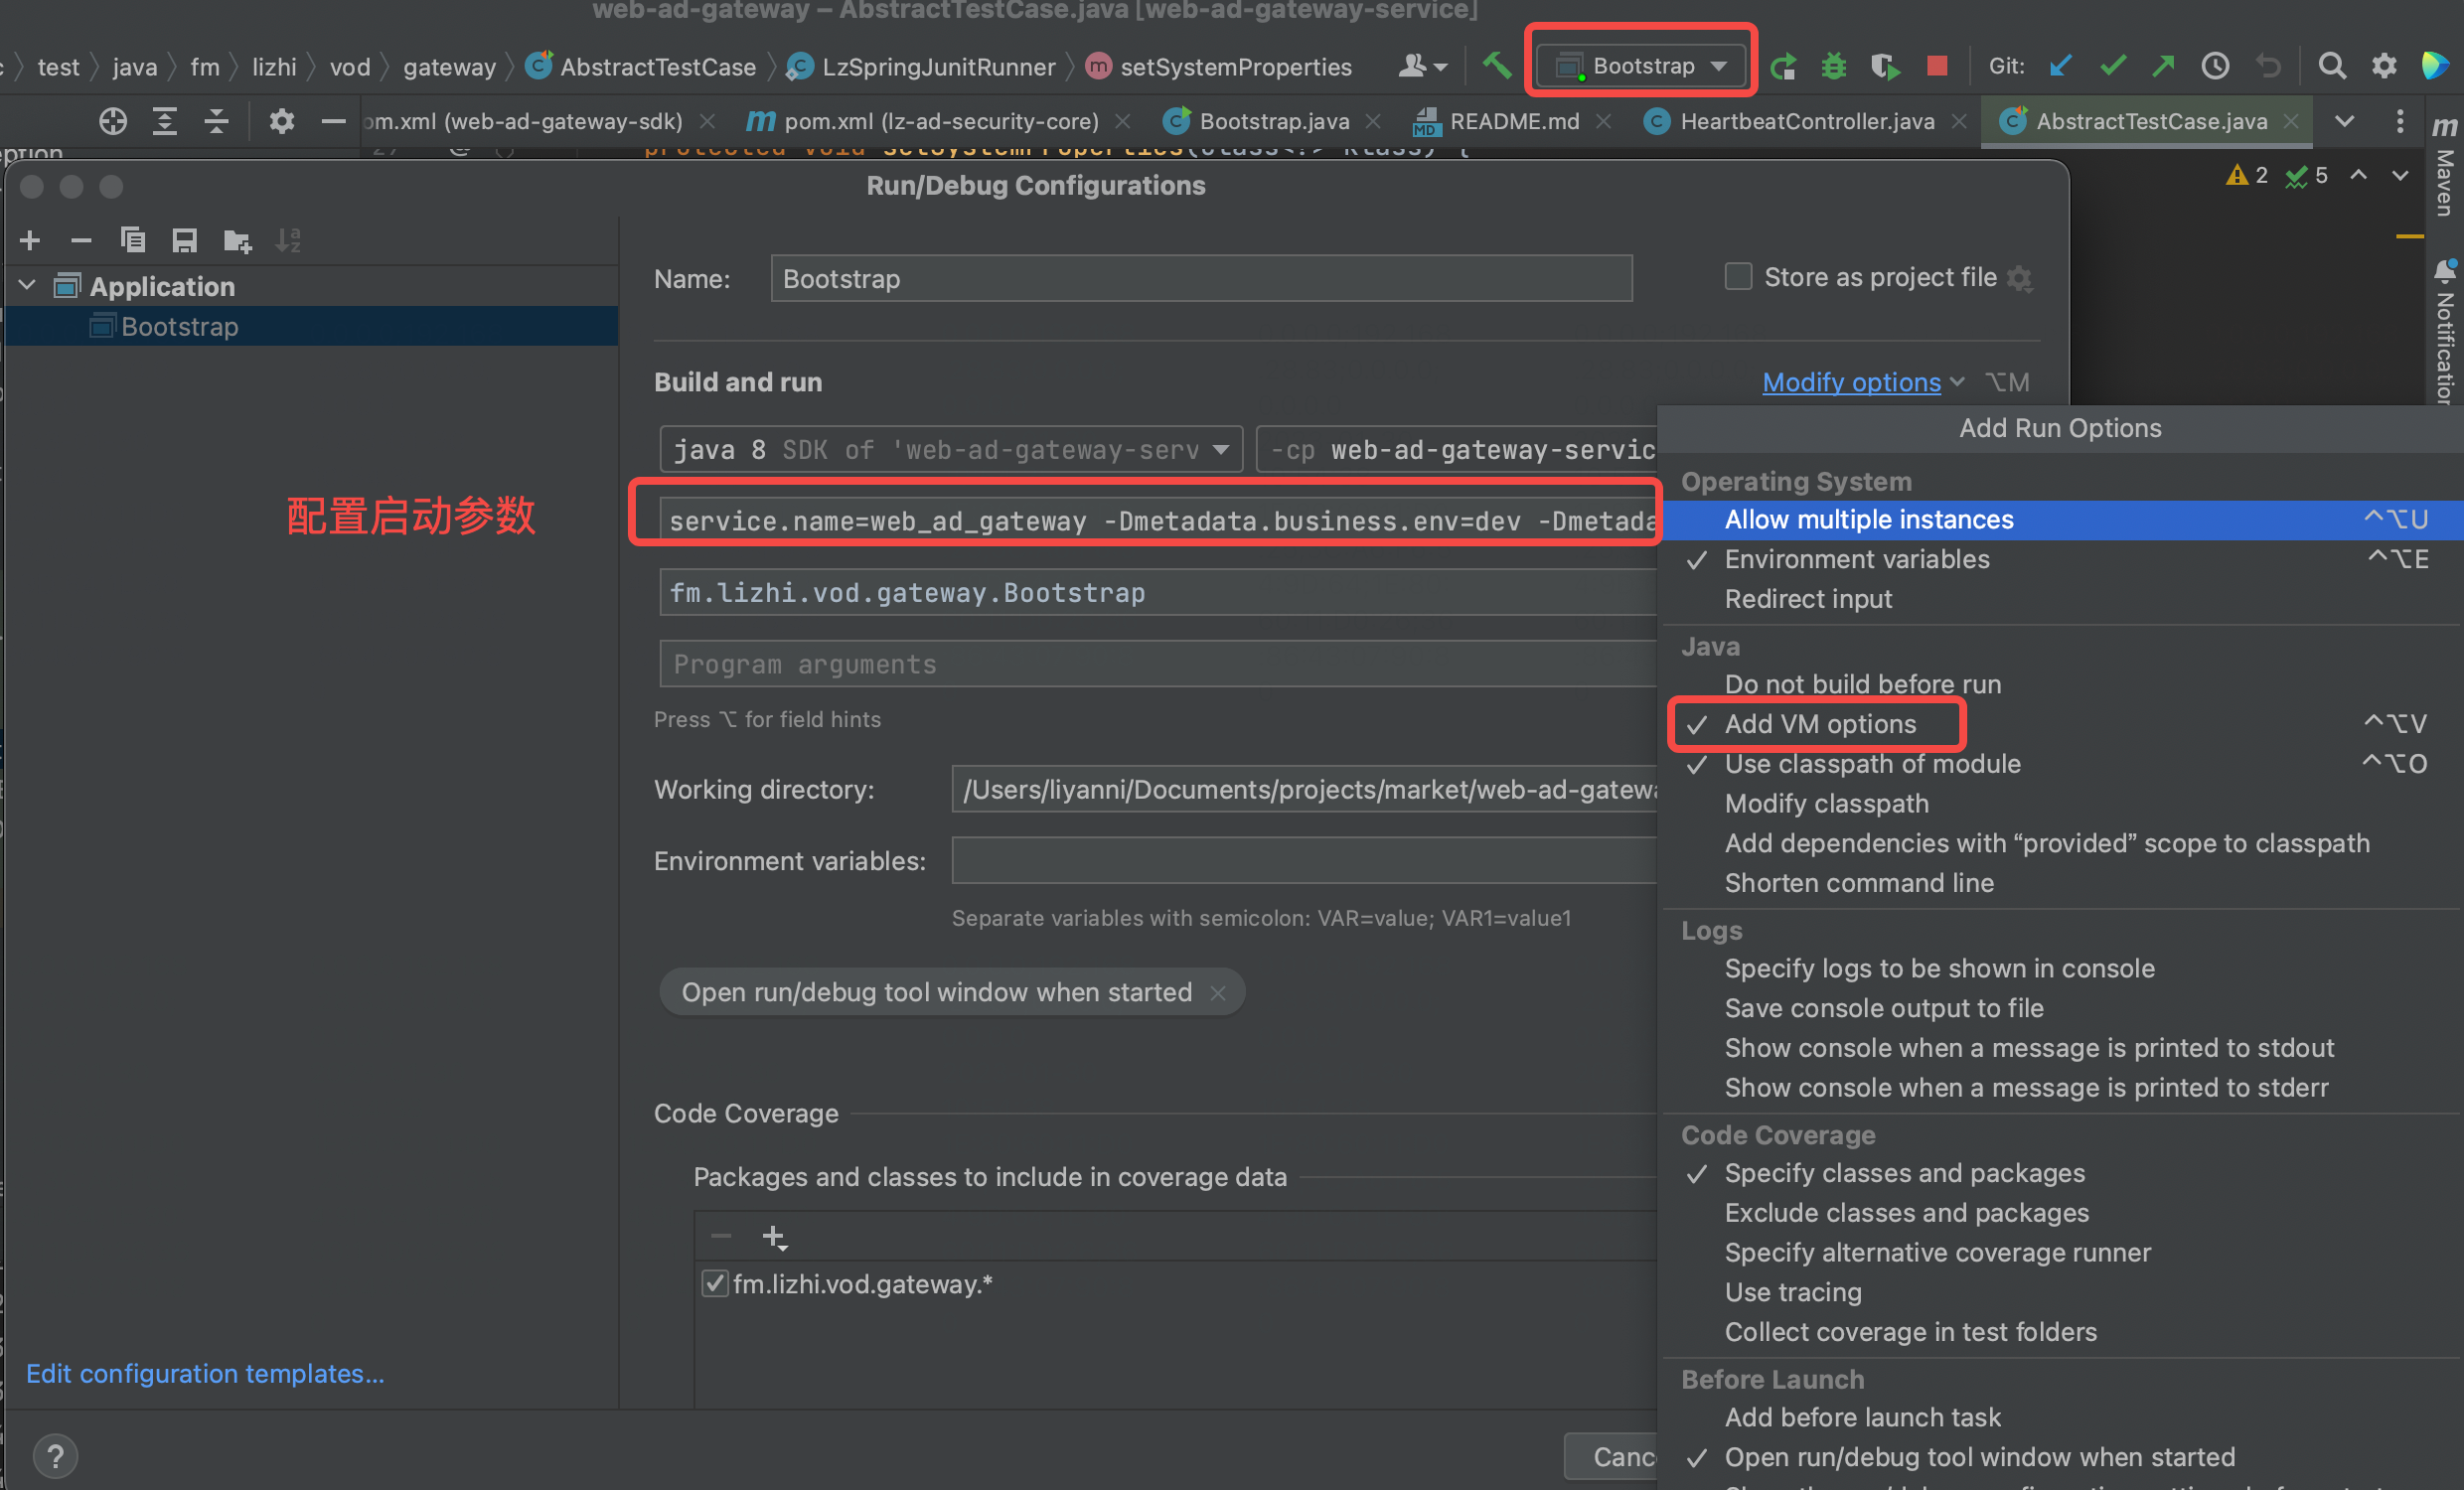
# 配置 VMOptions
右上角 Edit configurations =》 Modify options =》Add VM Opions =》输入对应参数
-Dmetadata.region=CN -Dmetadata.service.name=xxx -Dmetadata.business.env=dev -Dmetadata.deploy.env=test
1